
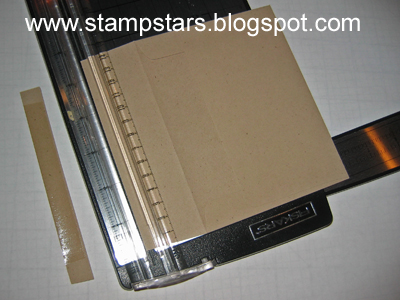
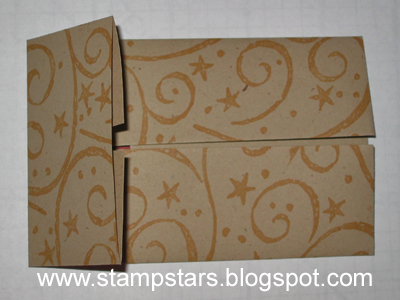
Step One: Take the envelope and trim it with the
flap open to 6". This removes the adhesive strip.
flap open to 6". This removes the adhesive strip.
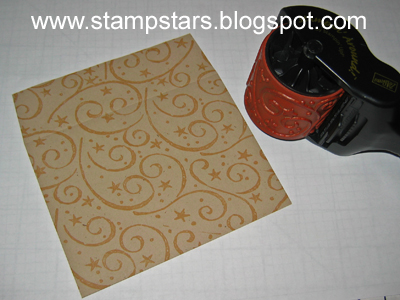
Step Two: Wheel or stamp the envelope.
I used Creamy Caramel Ink and the "Swirling Stars"
Jumbo Wheel. You can stamp both sides if you'd like...
I am a lazy stamper so I just stamp the side that shows.
I used Creamy Caramel Ink and the "Swirling Stars"
Jumbo Wheel. You can stamp both sides if you'd like...
I am a lazy stamper so I just stamp the side that shows.
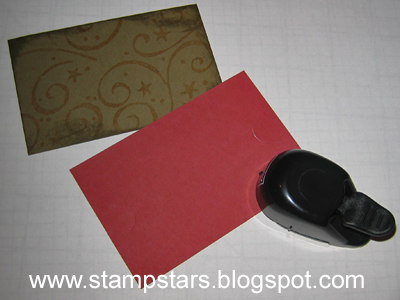
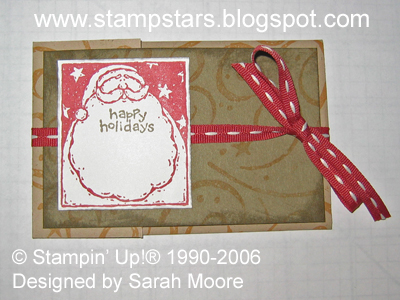
Step Three: The card that is affixed to the outside of the
Gift Card Holder and the card on the inside that actually
holds the gift card are the same size (4 1/8 x 2 5/8). I used
The new"In Color" papers Cranberry Crisp and True Thyme.
Use the Stampin' Up! Slit Punch to cut notches in the ends of the
insert card. Wheel the Other card to match the envelope and
using a "direct to paper" technique tint the edges in True Thyme.
Step Four: Place insert card all the way into the envelope
and center the card. Using the card inside as a guide, fold
the edges of the card to the center. First one side...
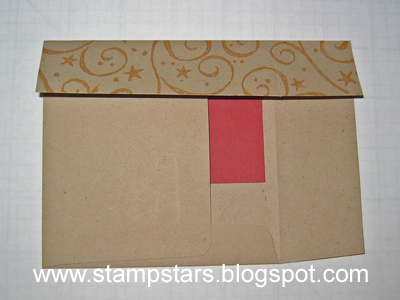
then the other side... next fold the flap over the top.
Use a Bone Folder to set the crease.
Finish the assembly: Affix the True Thyme card to the
envelope flap with Snail Adhesive. Then tie a matching
ribbon around the card (I used Cranberry Crisp Stitched
Grosgrain from the Holiday Mini Catalog). Do not glue
the ribbon in place. It needs to remain free so it can be
re-tied easily by the user. Lastly; affix a decorative
bit to the front. I used Cranberry Crisp Ink to stamp this
Santa from the set "Holiday Woodcuts" on Whisper White.
I cut out the images free-hand, and I used my Bone Folder
to add some texture to the edges. I affixed this with Dementionals.

All Done!
2 comments:
Very clever! Like it very much!
Jody
Very cool, Sarah!
Post a Comment